X c s i t e
Version 0.5.0
Quick and
Dirty User’s Guide
© 2004-2005 Aron Dobos
1. What is Xcsite and
what is it good for?
The X-Windows Construction Site ('Xcsite') is an exciting rapid application development (RAD) tool that is capable of producing cross-platform graphical user interfaces with minimal development time. The development environment runs on Linux/GTK systems, as well as Solaris and other POSIX-compatible Unix systems that support GTK/X11. The target application that is generated is a native executable with minimal external dependencies for easy deployment to various target environments. Furthermore, the runtime library upon which Xcsite applications are based is a cross-platform library, meaning that the target application can be compiled natively for Mac OS X and Windows also, even though the development environment runs only on Unix/X11. Although compilation to other platforms can be quite complicated at times, it can be done.
Xcsite's development interface is very similar to that of Microsoft Visual Basic. Although at this stage in development Xcsite is not as full featured, and probably has some annoyances and bugs, it supports all the fundamental interface components, as well as some more specialized ones. Unlike Visual Basic, all code generated by Xcsite (as well as user-written event handler code) is in C++, making it very easy to utilize the colossal smorgasbord of C and C++ function and class libraries that are available.
Target applications generated by Xcsite use at the lowest level the excellent open source FLTK toolkit (http://www.fltk.org) to provide the cross-platform UI support. As such, an application will look identical and behave identically on all platforms. The downside to this true cross-platform feature is that the application may “look weird” or behave slightly differently from applications that use the native windowing toolkits of the respective operating systems.
The whole runtime library is statically linked into all Xcsite applications, to minimize external library dependencies for all platforms. An application compiled on Windows requires no external libraries, and a quick 'ldd' of a Linux binary shows that the library requirements are indeed extremely basic and sure to be available on any normal system.
libXext.so.6 =>
/usr/X11R6/lib/libXext.so.6 (0x40033000)
libX11.so.6 =>
/usr/X11R6/lib/libX11.so.6 (0x40042000)
libstdc++.so.5
=> /usr/lib/libstdc++.so.5 (0x40121000)
libm.so.6 => /lib/tls/libm.so.6
(0x401d4000)
libgcc_s.so.1 => /lib/libgcc_s.so.1
(0x401f6000)
libc.so.6 => /lib/tls/libc.so.6
(0x42000000)
libdl.so.2 => /lib/libdl.so.2
(0x401fe000)
/lib/ld-linux.so.2 =>
/lib/ld-linux.so.2 (0x40000000)
This ensures that a binary application can be easily distributed without too worrying about system dependencies.
2. Using Xcsite
Xcsite consists of two main windows that are always present during development. The top window is the control window from which a user can create a new project, save or open projects, compile and debug projects, or change project settings. Any compiler errors are shown in this window, and the selectors in the middle are used to navigate through application code segments that are written by the user, e.g. Event handlers, the main() function, etc.
Global development tool settings are modified under the File menu. The three settings required for basic operation are the runtime library directory, the name of the C++ compiler to binary to use, and the list of libraries needed to link to the X11 windowing system. Upon startup, Xcsite checks for the existence of the runtime library, and if it is not found, the user will be prompted to enter the correct path to it. The default path is /usr/local/xcsite/runtime.
When a project is saved, a whole directory structure is created in which all the code segments (event handlers, etc), interface definitions, and settings are saved. To open a project, open the file named 'project' in the directory that was created when the project was saved.
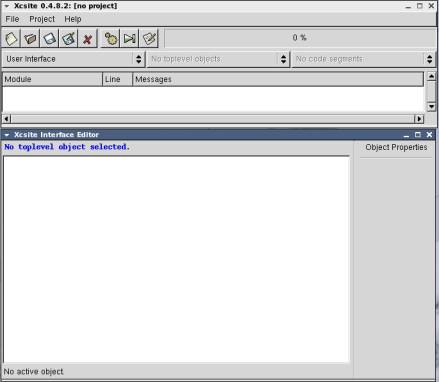
The second window is the interface editor. It is in this window that an application's user interface is created. On the right is a context sensitive property editor. When an interface component is selected, the property editor will show all modifiable properties for that object. Control of the interface editor is achieved through a context sensitive menu that is accessed with the right mouse button. It is through this menu that event handlers can be registered to widgets, and new widgets added (or removed) to (or from) the interface. Widgets are selected and positioned with the left mouse button.
Each widget in Xcsite has a name that is used to identify it. A widget name must be a legal C/C++ identifier name (since it is how a widget is referenced in event handlers, etc), and must no two widgets may have the same name. The default name given to a new widget is the type of the widget (i.e. a Window) and a number, such as 'Window1' or 'Button2' or 'TextEditor3'. It is recommended that each widget be given a name appropriate to its function. For example, the main window of an application might be named 'WndMain', and the code editor widget in the window might be 'TxtCode'. The quit button might be 'CmdQuit'. Consistent naming with a two or three letter prefix identifying the type of widget has proven to be a very *good* habit. The widget's name is always the first property in the property editor.
Toplevel application windows are shown within the interface editor window. A toplevel window's title bar is simulated at the top of the interface editor window, but no title bar or border is attached to the toplevel window in the designer. To create a new toplevel window, right click on the blank white area, and select 'New Window'. A new window is created and its properties are shown on the right in the property editor. The interface editor should now look like this:

Change the window's name to 'WndMain' (since it is good practice). Very shortly we will have a hello-world equivalent application. Suppose we want the application to end when the close button 'X' is clicked. This is an event that a toplevel window might receive, and as such, the Window class in the runtime library (of which our window is an instance) provides the 'OnClose' event handler. To access it, right click on the window, and from the context menu, select from under the '[ Window Events ]' heading the 'Close->Edit Handler' option. A small empty code window will pop up. Any code that should be run when the window receives a close request should be put here. Since we just want to end the application, we simply call the 'EndApp()' function, which is part of the Xcsite runtime library.
There is no save button on code windows, as each code window keeps track of any changes. All code 'segments' are saved when the project is saved. Each code editor window provides some simple undo/redo and editing functions, as well as a very rudimentary (and awkward) search feature. These functions may be accessed by the toolbar at the top, or by a right-button context menu. At the top of each code window is a blue label indicating the function/method prototype for the event handler (or other application function). We see that for the Close event handler, the prototype is:
void WndMain::OnClose( Event &pEvt
)
Each toplevel window results in a new class definition. The event handlers for that toplevel window and all of its child widgets are defined as member functions of the window class. Each event handler is passed a reference to an Event structure that contains some information about what happened. Consult the reference documentation to see which fields in the structure are applicable to which events generated by various widgets. Note that the code generation mechanism automatically inserts the opening and closing curly braces for the function definition, even though they are not displayed in the code window. This may make things feel somewhat awkward, but hopefully Xcsite 2.0 will address this issue.
The next task for our basic application is to write the 'main' function. On the Xcsite control window, use the first selector to choose 'On Application Init'. This is a new instance of our window class should be declared, created, and shown. It is common to forget this step, and have nothing happen when the program is run. Following the commented template code, we insert
WndMain *wnd = new WndMain;
wnd->show();
The AppInit function returns 'true', meaning that the application should be run. If for some reason some application initialization fails, returning false will keep the runtime library from entering the event processing loop, and the application will simply exit.
The left-most selector on the main window deserves some discussion. It provides access to global headers or functions for the application. The options are described below:
- User Interface: Sets the center and right selectors to browse the user interface.
- Global Declarations: Any variables or functions declared here are global to the application.
- Global Implementations: Here is where global functions should be written.
- On Application Init: Code run when the application starts.
- On Application Quit: Code run when right before the application ends.
- Ext. Headers: Sets the center selector to browse external header files added to the project.
- Ext. Sources: Sets the center selector to browse external source files added to the project.
At this point, our useless demo application should compile and run. The application window should look like this:
Closing the window should end the application. Congratulations! You've just written your first Xcsite application. Don't get too Xcsited, though. We will now add some basic widgets.
Right click on the window in the interface editor, and select 'New Label'. A label will placed in the upper right hand corner of the window. Drag it to the center of the window, and change the Label property to 'Hello world!' You will see the label's text update on the interface editor. Resize the label to make it big enough to show all of the text. Now, create a TextEntry widget, and two Button widgets. Name one of the buttons 'CmdQuit', and change it's label to 'Quit'. Right click on it, and select the 'Clicked->Edit Handler' menu item. Since we want to close the window when the quit button is clicked, we simply call the 'close()' method of the window class. Recall that all child widgets and event handlers are members of the toplevel window class. As such, we can simply type 'close();', and the toplevel window's close method will be called. To be explicit, we could use the C++ 'this' pointer, and write 'this->close();'. Try running the program and clicking the Quit button. The application should end just like before.
Let's make the other button show a message box displaying the text in the text entry widget. Before we write any event handlers, change the name of the text widget to 'TxtMessage', and the button to 'CmdMsgBox'. We don't have to respond to any of the text entry's events, but we do want to implement the Clicked event for the button. Just like before, bring up the clicked handler for the second button, and enter the code:
Message("%s",
TxtMessage->getText().cStr() );
The 'Message' function is a global function in the runtime library, and is exactly like the standard C printf statement, only it displays a message box. The getText() method of the TextEntry class (note: TxtMessage is a pointer to an instance of the TextEntry class) returns the text in the text entry, but returns it as a String type. Since printf formats require the standard C-string char* format, we call the cStr() method of the String class to convert it properly for the format string.
Run the application. Clicking the Message button will pop up a little message dialog displaying the text in the text entry widget.
Those are the basics of writing an Xcsite application. There is a rich set of user interface widgets available, including a heavy-duty multi-line text editor, a powerful 2-D graphing widget, a Canvas widget for any kind of drawing, and a selection of numeric input widgets alongside all of the standard ones. See the reference documentation for full descriptions of the widgets and the events they generate. File chooser dialogs, input dialogs, message boxes, and similar items are available as global functions, and documented under the appropriate section of the documentation. Apart from the user interface classes, the Xcsite runtime library gives a whole container library, complete with Strings, Hashes, Vectors, Stacks, Queues, LineReaders, Tokenziers, and the like. In terms of widget event handling, especially important is to understand the somewhat complex window closing mechanism, as well has how menu bar events are handled.
The best way to learn to use Xcsite is to play around with it, and to look at the included example programs. The reference documentation is also a great thing to look at.
3. Building Xcsite and the runtime library on your Unix
System
The Xcsite build requires gcc and g++, perl, GTK+ 1.2.9 or higher (Not GTK-2.0), and the standard GNU make tools (autoconf, automake, etc). This installation procedure should compile and install the Xcsite development environment and runtime library to /usr/local/xcsite. The installation directory can be changed by modifying the toplevel makefile in the xcsite/ directory.
> gunzip xcsite-0.4.8.2-src.tar.gz
> cd xcsite
> make
> cd runtime/fltk
> ./configure
> make
> cd ../..
> su
> make
install
Note that the FLTK library used is a modified version. It is not the same as the stock version 1.1.4 downloadable from the fltk website. This is because some additional code had to be added to support events in the way desired.
4. Confusions,
Questions, Answers, etc.
Adding class variables and member functions to a toplevel window class
Since each toplevel window in an application is a new class definition, a user might want to create local data and methods for that toplevel class. For example, if a toplevel window is a text editor, each window might want to store whether the text in that window has been modified, as well as the filename of the file being edited. Using the selectors on the main Xcsite window, the user can edit the 'class.Declarations' for a toplevel window, as well as the 'class.Implementations'. In the declarations section, variables and member functions can be defined. Although no class definition is shown (and no curly braces either), think of this as simply the header file for the class, and the class.Implementations window as the place to write member functions. When writing a member function for the 'WndMain' class, for example, the method must be written as 'WndMain::someFunction', since the 'WndMain::' storage class will not automatically be added. See the examples for more information. This mechanism is very clunky, and should be fixed in Xcsite 2.0. However, it does provide the desired support, although not in the most user friendly fashion.
Adding external source files to the project
When adding external header files and source files to an Xcsite project via the Project Settings dialog (available under the Project menu), the source files are copied to the project directory's ext/ subdirectory. Furthermore, the filenames are mangled by adding 'ext.hdr.' to the beginning of a header file, and 'ext.src.' to the beginning of a source file. This is very annoying and will be fixed in Xcsite 2.0. Originally it was designed to help locate compiler errors in the code. However, the most annoying thing is that any inclusion of external header files by external sources must be modified to include the aforementioned prefix. However, the external header files are automatically included in each Xcsite generated source file, so functions and variables declared there should automatically become available.
Linking to other libraries and including other headers
The Project Settings dialog provides the user the option to add libraries to be linked into the final binary. The math library (-lm) is automatically linked, as are the libraries required by the base application (glibc, stdc++, m, X11, etc). If global preprocessor #defines are desired, they can be added via the 'Extra Directives' section. Here the header files for system wide libraries or any other libraries needed can be included as well.
Compiling and Debugging
Compiling an application can be somewhat annoying. The built-in 'make' command is extremely rudimentary, and will recompile the whole project if a widget is added or removed, or an event handler is added or removed. It is one's hope that this will be fixed in later versions of Xcsite. Furthermore, there is a known bug that sometimes the error messages generated by the compiler cannot be decoded properly, and the problematic line in the source code thus cannot be brought to the front and highlighted. This is another error that will be fixed in Xcsite 2.0.
The Xcsite environment provides no integrated debugger. The standard command line debugger 'gdb' is started up when the debug button is pushed.
Compiling on applications on Windows platforms is relatively straightforward. Download the Xcsite-runtime.exe file and extract it to the local hard disk, i.e. to C:\Xcsite. Make sure the MinGW 3.x gcc/g++ toolchain is installed (http://www.mingw.org) , and that the system path (Windows XP: Control Panel->System->Advanced->Environment Variables->%PATH%) includes the C:\MinGW\bin directory.
In the src directory of your project, edit the makefile.cmn using any text editor, and change the RUNTIMEDIR to C:/Xcsite/runtime, or wherever the runtime library was installed. Then bring up a command prompt, change to your project’s src directory, and type ‘make –f makefile.w32’. If all goes well your project should compile and the output file should be target.exe. This executable has no non-standard DLL dependences, so it should be easily distributed.
5. More Information
Email me at adobos1@swarthmore.edu
Look at the reference documentation in the xcsite/doc directory.
Download CRISC, a very cool project built using Xcsite.
http://www.engin.swarthmore.edu/~adobos1/e25/final/
Maybe someday I'll make an Xcsite webpage online.
Maybe someday Xcsite 2.0 will be released :)